Garmin GPS Update in Linux

I own a Garmin GPS that I wanted to update. It’s about a year old and the maps are not up-to-date. For example, it does not include the new second Penang bridge. Garmin provides updated maps on its website but the installer runs in Windows. Since I did not have a Windows machine available, I had to find another way.

Turns out that Microsoft gives away time-limited virtual machine images of Windows, primarily for browser testing. So, I downloaded the smallest one – IE6 on WinXP. After that, it had to be extracted from the archive. This can be done by:


$ chmod +x IE6.WinXP.For.LinuxVirtualBox.sfx
$ ./IE6.WinXP.For.LinuxVirtualBox.sfx

Next, the extracted OVA file needs to be imported into VirtualBox and run.

Screenshot - 13092014 - 12:23:52

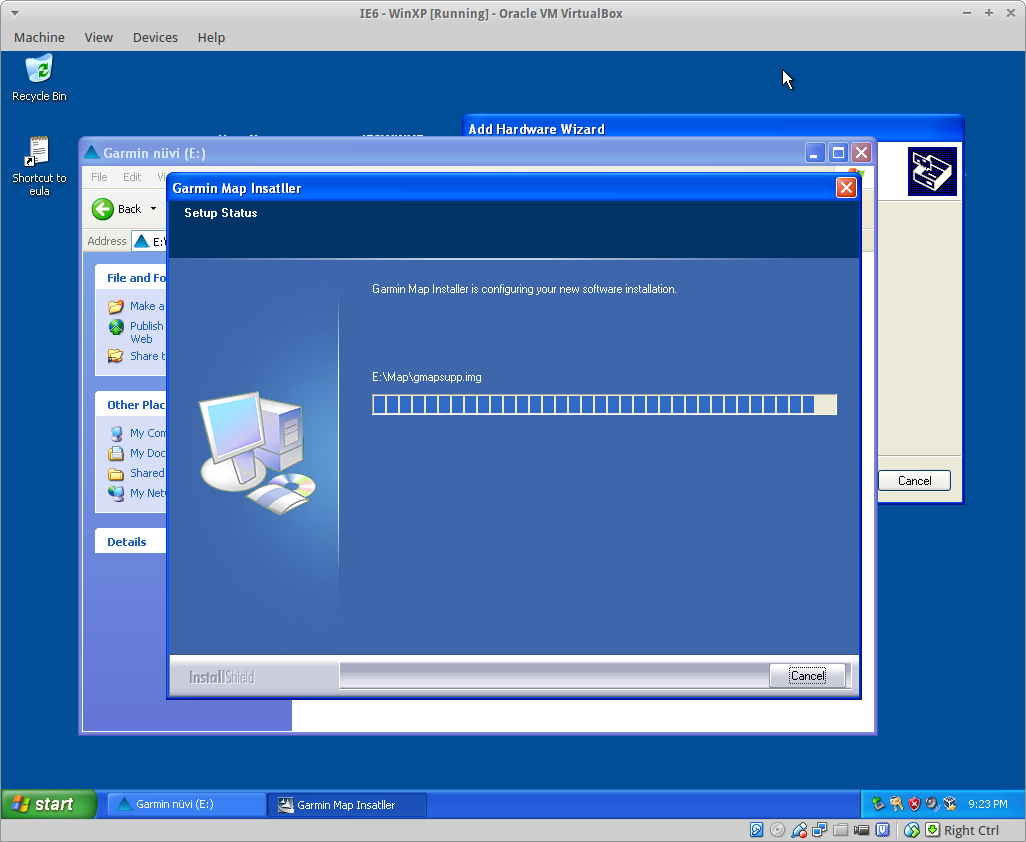
After that, it’s just a matter of using the browser to download the update from Garmin and running the map.

Note: We just need to make sure that the Garmin is configured as a USB storage device and that it is attached to the virtual machine, instead of the host machine.

Advertisement

OpenWRT DIR615

I have a wonky DIR615-G2 that came standard with my UniFi subscription. It would randomly reboot and even fail to boot from time to time. Even trying to re-flash the firmware using the Emergency mode is iffy.

So, I figured out a way to at least get it to boot OpenWRT in a clean way. Essentially, I had to flash it with a DD-WRT image because the stock OpenWRT image does not work. Then, the standard method is to upgrade it to OpenWRT. However, that fails too.

So, I had to work out my own way, which does not require SSH running.

Essentially:

  1. Boot the router into emergency mode.
  2. Flash it with the stock DD-WRT firmware.
  3. Reboot the device.
  4. Telnet to the router.
    telnet 192.168.1.1
  5. Transfer the OpenWRT upgrade image using netcat
    nc -l -p 1234 > /tmp/dir620.bin
  6. Erase the nvram
    erase nvram
  7. Erase the flash
    mtd erase linux
  8. Flash the upgrade
    mtd -r write /tmp/dir620.bin linux
  9. Reboot the device.

ddwrtopenwrtdir615

NAT64 and DNS64

I have been investigating options for moving my network to a pure IPv6 stack. The main issue here is ensuring that there is still connectivity to the IPv4 Internet after the move. The best options that I have found that support this configuration is the NAT64/DNS64 stack.

Setting this up was a bit of a head-ache as the documentation was lacking for Tayga on Linux as a NAT64 router. That said, I had to follow the example strictly and I was able to replicate things on my OpenWRT 12.09 router.

Setting up the DNS64 settings was much easier and things worked after that. I was able to ping and connect to the IPv4 world on my pure IPv6 network. Unfortunately, I had trouble connecting to the IPv6 Internet instead. Thing is that my Internet connection is still pure IPv4.

So, I’m now investigating the possibility of running a DNS server that will not forward AAAA record lookups but things do not look good. There doesn’t seem to be any DNS server built with that feature. Looks like I’m going to have to roll my own.

I might have to look at the feasibility of modifying the TOTD source, once I can find it though.

SimpleSAMLphp with WordPress on OpenShift

These are the steps that I used to get SimpleSAMLphp running with WordPress on OpenShift.

First, copy the files up to the server and decompress them.

$ rhc scp MYAPP upload simplesamlphp.tar.gz app-root/data
$ rhc ssh MYAPP
$ cd app-root/data
$ tar -zxf simplesamlphp.tar.gz

Then, link it to a public WordPress directory e.g. uploads

$ cd uploads
$ ln -s ../simplesamlphp/www/ saml
$ cd ../simplesamlphp

Then, just configure SimpleSAMLphp as usual.

The only key thing to note is that the baseurlpath needs to be configured with a FULL path name. For some reason, SimpleSAMLphp was unable to detect that it was running behind a reverse proxy.

Experimenting with CORS

As a follow up to yesterday’s post on CORS, I did some simple experiments to test it out to see if it’ll work specifically by using JQuery primitives. It was easy as pie to make it work. The following little experiment demonstrates the feasibility of using CORS to use the browser as a middle-man.

I just wrote a simple cors.php script and fired it up from the browser.

If the Access-Control-Allow-Origin: * header is removed, then the console log will show the following error:

XMLHttpRequest cannot load http://127.0.0.1/cors.php. No 'Access-Control-Allow-Origin' header is present on the requested resource. Origin 'http://localhost' is therefore not allowed access.

However, once it is in there, the console log shows the expected output, which is essentially the data payload being transmitted. My only concern now is the size of the data blob that can be transmitted via this method using JQuery. I gather that there should be a limit on the size of such a transmission.

Also, there is a concern on security. So, I will need to figure out a mechanism to protect the communications between the parties. There are many other Access-Control-Allow headers that can be returned such as those listed here.

This will require more research.

PS: According to this site, JQuery does not support CORS on IE. So that’s a browser limitation that I’ll have to keep in mind.

Cross-Origin Resource Sharing (CORS)

Cross-origin resource sharing (CORS) is an interesting technology that will be very useful for one of our new upcoming products. It is a technology that will allow us to use the Browser as a proxy to connect to a different machine using Javascript. It is also supported by all modern browsers, which is a good thing.

This technique, when combined with XMLHTTP connections will allow us to effectively create a tunnel between the primary server and a secondary server via the browser. This allows the public server to communicate directly with the private server across the web-browser using pure Javascript.

This is exciting…